|
|
|
|

Click Photo For Enlargement (254 KB)
|
|
|
|
The last aluminum pieces form the front of the turret and a cross plate that will be used to mount the gun system. Also shown here are the molded TTS track and the completed suspension assemblies.
|
|
|
|
|
The track pads (inside and outside), drive sprockets and idler wheels are molded polyurethane, which is very durable and easy to machine. The drive sprockets are bolted to a steel hub that mounts on the slotted drive shaft.
|
|
|

Click Photo For Enlargement (286 KB)
|
|
|
|

Click Photo For Enlargement (261 KB)
|
|
|
|
The idler wheel is mounted on a swing arm that allows it to swing through 90 degrees from straight down to straight back. When fully released (straight down) the track is easily removed, while in normal operation it is adjusted to provide just enough tension to eliminate excessive slack. The ability to tune track tension can help solve various performance problems in the field. More importantly, the ability to easily remove the track simplifies routine maintenance and cleaning chores.
|
|
|
|
|
Close-up of the simple turn-buckle used to tension the track. Simply pull back the idler wheel by hand and twist the turn-buckle to set the tension. To remove the track, pull the idler up to release the pressure on the turn-buckle and slide it off the bolt.
|
|
|

Click Photo For Enlargement (257 KB)
|
|
|
|

Click Photo For Enlargement (191 KB)
|
|
|
|
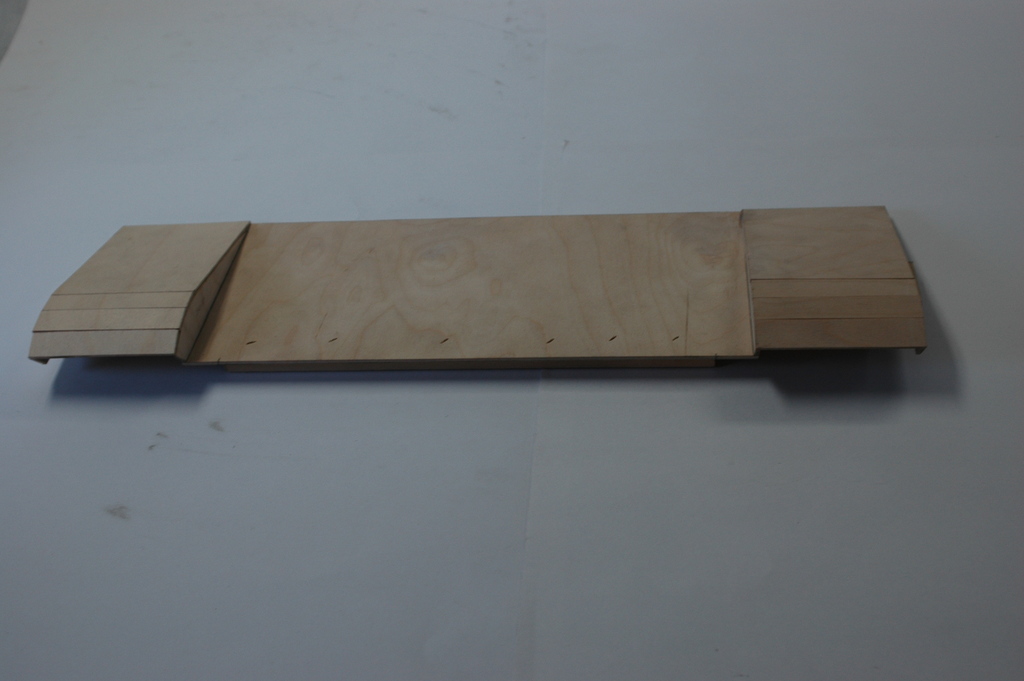
The upper hull and decks need to be strong enough to be hit at point-blank range with paint balls and to withstand the normal wear and tear of the battlefield and workshop. Composite shells made from carbon fiber, fiberglass and epoxy resin meet all of the design requirements. Shown here is the "skin-on-frame" framework for the front fender assembly. Thin plywood and wood frame will be glassed to form the final surface. Carbon fiber will be used for critical joints and for flat areas like the fenders that tend to hit things on the battlefield (e.g., trees, rocks, other tanks, etc).
|
|
|
|
|
The "turret" section has some pretty modern looking facets even though it was designed over 70 years ago. The large hatch openings will be covered by aluminum doors. The front panel will be cut out after the composites have cured. The front section has a lip that slides over the aluminum front plate, helping to keep paint and water on the outside of the vehicle.
|
|
|

Click Photo For Enlargement (188 KB)
|
|
|
|

Click Photo For Enlargement (195 KB)
|
|
|
|
The back section has a large hatch that gives access to the power switch for the electronics. The main power switch is mounted to the lower hull and is accessible from outside the tank. The turret and back sections were built separately to make them easier to sand and glass over. Once the glass process was complete, the two sections were glued together and the interior bulkheads removed to allow easier installation of systems.
|
|
|
|
|
I love building systems and solving design problems, but when it comes to a nice paint job I seek out the master painter, brother John. Well before the hull was started John researched the various camo schemes that could have been used on the Italian or German versions. We decided that the one above would look cool and could be done in a "reasonable" amount of time.
|
|
|

Click Photo For Enlargement (93 KB)
|
|
|
|

Click Photo For Enlargement (85 KB)
|
|
|
|
Spray cans are John's paint brushes so a proper tape job is the most critical and longest step. The yellow base coat was sprayed first, then taped over to make stripes, with the red and green areas covered separately. A little tedious, but the result speaks for itself.
|
|
|
|
|
Crisp, clean lines and lots of interesting angles. During its debut battle, the Semovente hid under some large pine trees and blended in quite well. Green needles on the tree, brown needles under the tree and patchy areas of light and dark made for perfect cover.
|
|
|

Click Photo For Enlargement (126 KB)
|
|
|
|
|
|
|