|
|
|
|
| Type: |
JgPz 38(t) Hetzer |
Armament: |
75mm |
| Built: |
April 2008 |
Armor: |
60mm |
| Builder: |
Phil Palmer |
Rating: |
40/3 |
| Status: |
Operational |
Battles: |
6 |
| Owner: |
Phil Palmer |
Points Earned: |
7,500 |
| Call Sign: |
unknown |
Points Given: |
7,500 |
| Notes: |
| |
Scooter Motor DriveClam-shell Design
|
|
|
|
|
|
|
|
I have a confession to make- before this project I have never made
anything out of wood more complicated than a cupboard. Nevertheless as
you can see I finally built a working tank, to my own design. So this
article is not so much "Tank Building for Dummies" as "Tank Building
By a Dummy". Nevertheless, if it encourages you to have a go I will be
satisfied..... |
|
|
|
|
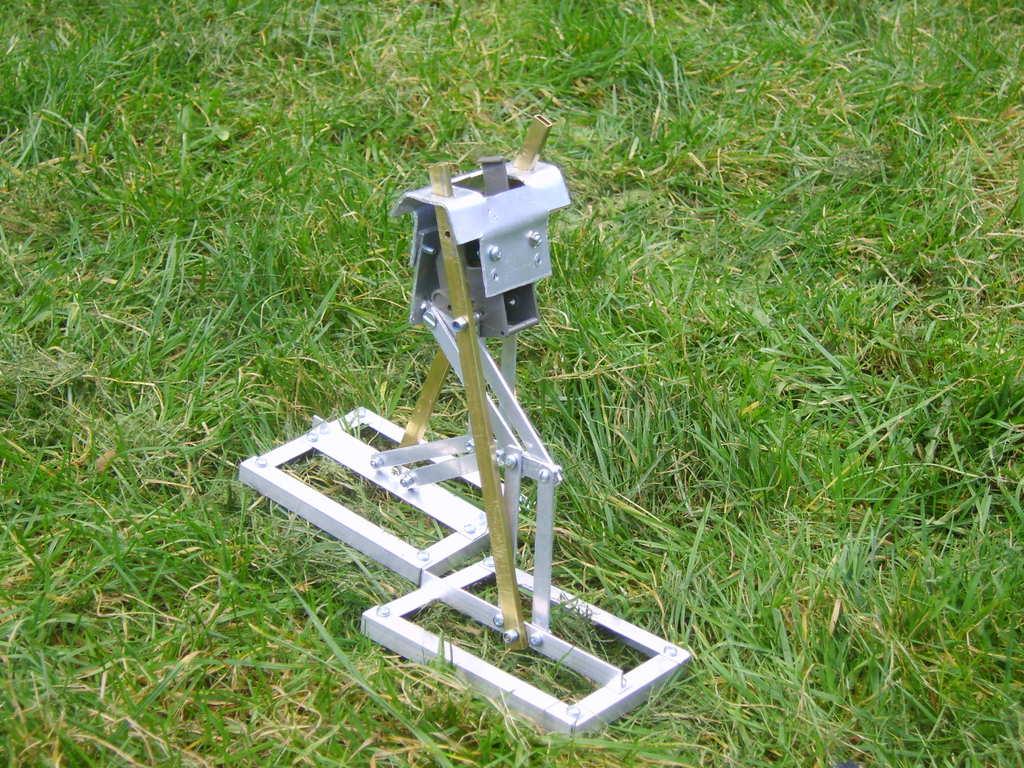
Before I decided to build this tank, I tried for some months to build
a walking robot soldier to 1/6th scale. The intention was to build a
model soldier who could mix it with the tanks on this site, firing
paintballs by way of a bazooka, or an overarm throw. This design was
promising and has a unique knee action to increase the stride, but it
was rather delicate and absolutely, definitely and positively would
not cope with rough grass. Various wheeled and even tracked designs
followed, mostly looking more or less like a small tank with a head on
the top, but nothing that looked remotely workable.
|
|
|

Click Photo For Enlargement (222 Kb)
|
|
|
|
Click Photo For Enlargement (116 Kb)
|
|
|
|
While this was going on, other builders in the UK were getting on with
real tanks, so I decided to get in on the action. To get it done
quickly, I decided I'd roughly follow Joe Sumner's Tank #010 (see
http://www.rctankcombat.com/tanks/T010/) and in particular download
his plans.
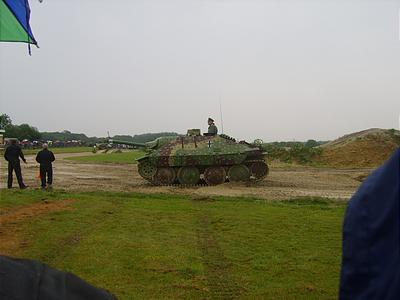
The Hetzer is a handsome beast and has the advantage of being
constructed of a small number of flat pieces of armour. I reckoned
that dispensing with a turret would make the tank a lot easier to
build, as well as leaving plenty of space inside for everything. That
at least was right.
|
|
|
|
|
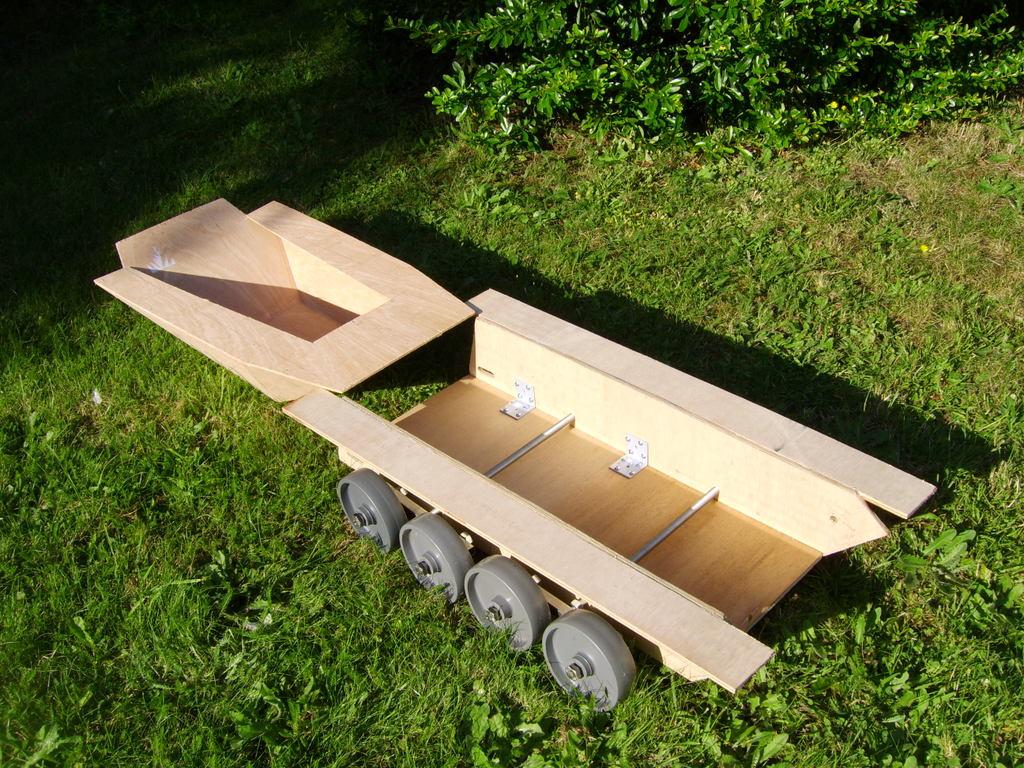
I was very proud when I finished the basic hull shape. Little did I
know at the time that the only part to remain substantially unaltered
by the end would be the lower hull sides and the suspension.
|
|
|

Click Photo For Enlargement (236 Kb)
|
|
|
|

Click Photo For Enlargement (252 Kb)
|
|
|
|
This was the basic concept- a "clamshell" design that would allow easy
access to the tank's innards. The mudguards were later removed- they
looked good but I needed more space for the tracks. You can see the
roadwheel suspension here- no springs, the wheels simply pivot in
pairs on the axles. I eventually had to narrow the wheels to fit the
track.
|
|
|
|
|
Next we needed some motors and gears. Rather than a 2-stage gearbox
like most tanks in the hobby, I opted for a single drive belt system.
This was for simplicity of building. The original scooter I took the
motors from had a pulley this size, so I hoped that as the tank would
have more friction but less weight, it ought to work... This is also
why the drive sprockets (on the outside of the tank, which turn the
track are so small; if they were larger I'd need bigger pulleys, or a
gearbox, to get the ratios right.
|
|
|

Click Photo For Enlargement (103 Kb)
|
|
|
|

Click Photo For Enlargement (121 Kb)
|
|
|
|
For the motors I bought two 100W electric scooters, costing about Ł34
each. I reckoned this was good value, as not only would I get the
motors and the drive belts, but also the batteries, fuses, switches,
wires, not to mention some spare wheels and bits. The fuses turned out
to be too weak and too poorly-made, but everything else worked out
pretty well.
|
|
|
|
|
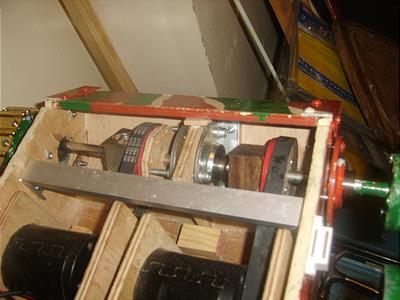
Looking ahead a bit, after testing the tank I discovered I needed a
lot more track tension, and a lot more bracing to stop the tank
pulling itself apart. Compare this picture with the last one. The
motors are on adjustable mounts to enable me to adjust the belt
tension. The pulleys are covered with elastic bands which give good
traction, but tend to break. The front end of the tank is very hard to
work in now.
|
|
|
Click Photo For Enlargement (118 Kb)
|
|
|
|

Click Photo For Enlargement (98 Kb)
|
|
|
|
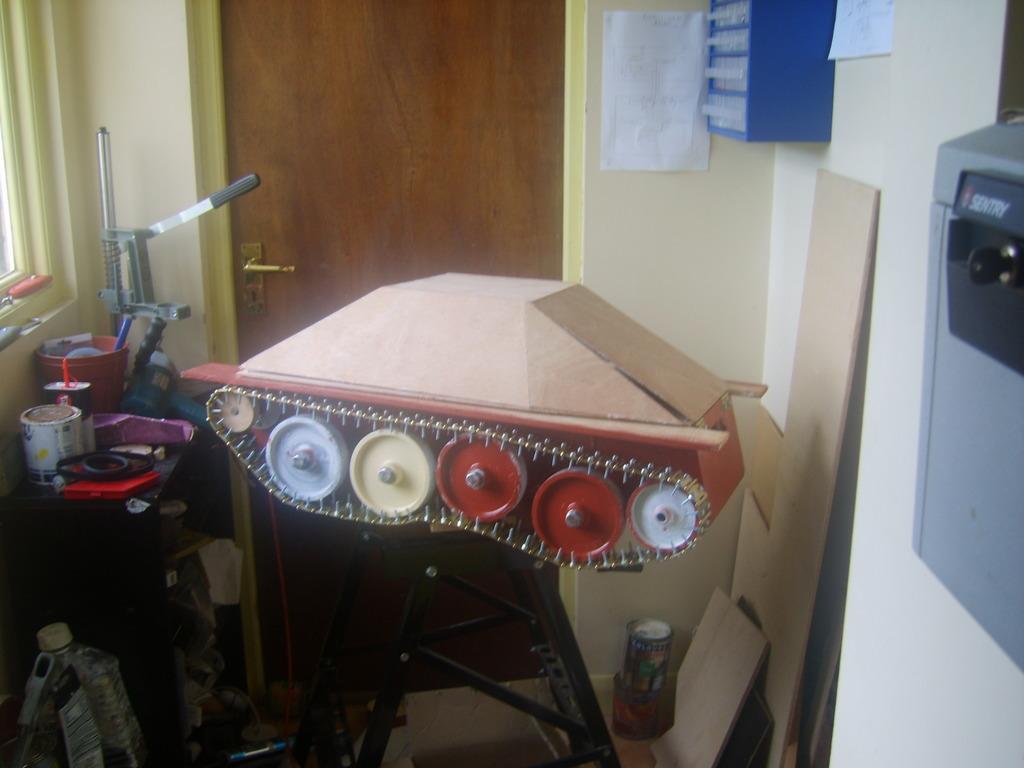
Going back a bit, having installed the motors I turned my attention
back to the upper hull. The real Hetzer has a distinctive and curvy
gun mantlet, and after trying various alternatives I decided to use a
simple "dormer window" design. I first made it in cardboard, and then
in wood- a system which worked very well.
|
|
|
|
|
|
|